Why and how to set up your Domain Name Server (DNS) email signatures on OVH?
The DNS email signatures setup is easy and takes a few minutes. But if you need help or have any questions, we remain fully available. At anytime, you can contact us by:
- Live chat (available at the bottom right of your screen)
- Contact form
- Booking a meeting with us

Why and how to set up your Domain Name Server (DNS) email signatures on OVH?

The DNS email signatures setup is easy and takes a few minutes. But if you need help or have any questions, we remain fully available. At anytime, you can contact us by:
- Live chat (available at the bottom right of your screen)
- Contact form
- Booking a meeting with us
Why set up your DNS email signatures?
- Your DNS is your electronic signature.
- Your electronic signature guarantees to Gmail/Outlook that you are who you say you are when sending an email to people having a Gmail/Outlook email address.
- Your DNS must be set up to have better deliverability (Having better deliverability means that a maximum of your sent emails will arrive in the inbox of your recipients and a minimum in their spam folder.).
- Your DNS must be set up to integrate your up-to-date calendar directly inside the email.
How to set up your DNS signature?
To add records for your domain, follow these steps:
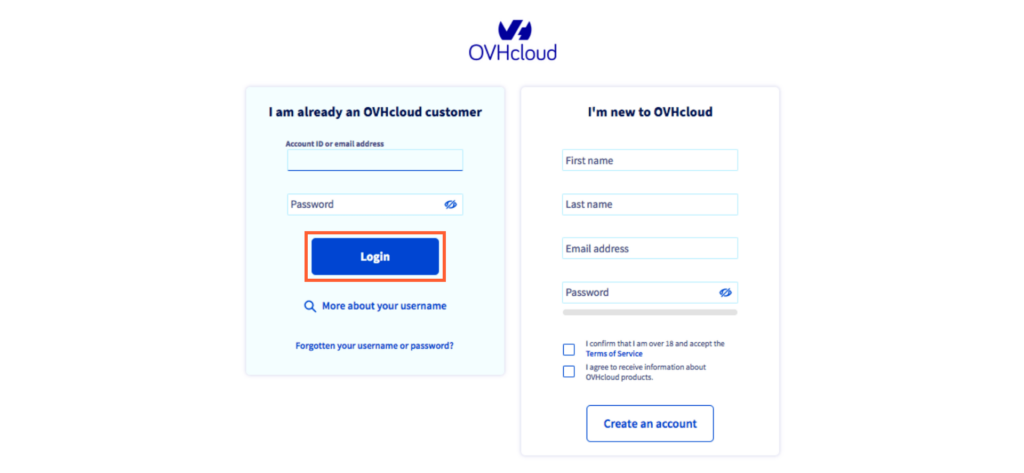
- Log in to your OVH account
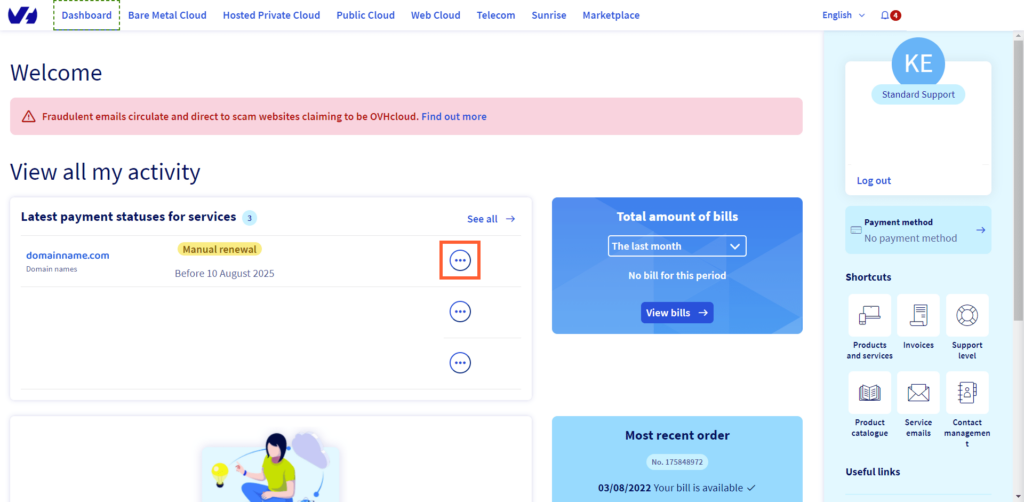
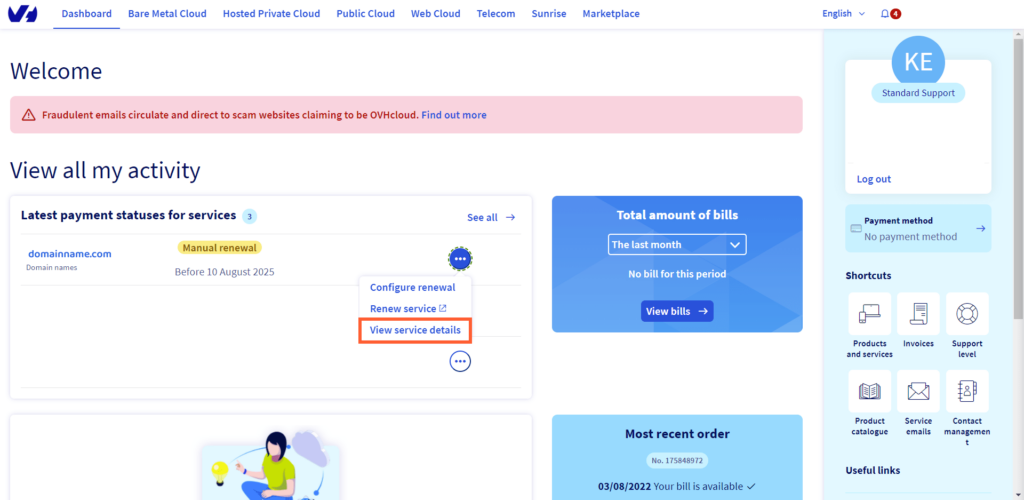
- Click on the Show More icon (circle with three dots) next to the domain
- Select View service details
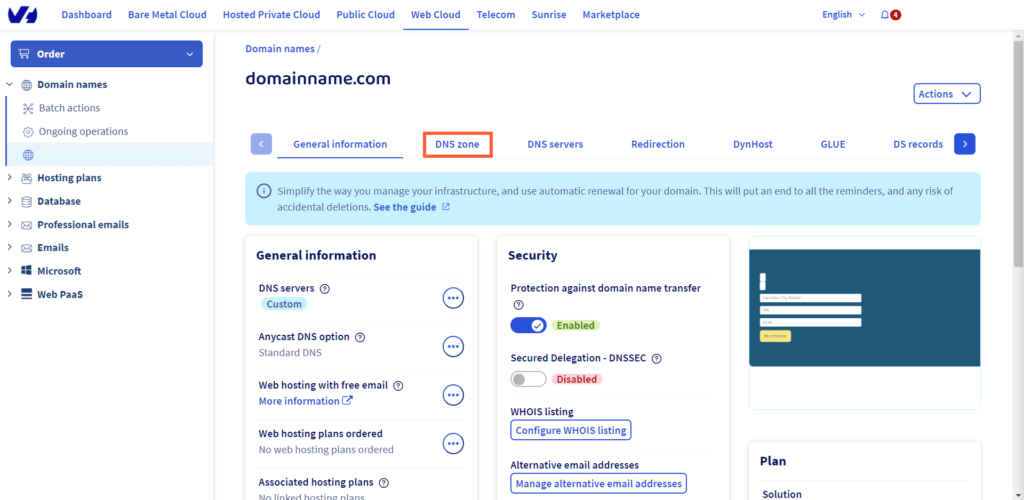
- In the menu, click DNS Zone
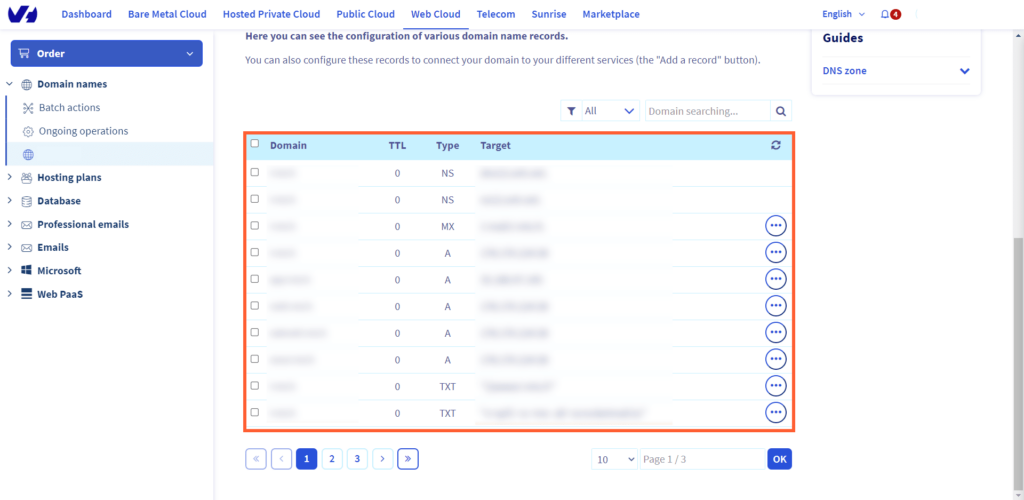
- Search for a value that contains the word "dmarc". If "dmarc" exists: go to step 10. Otherwise go to step 6
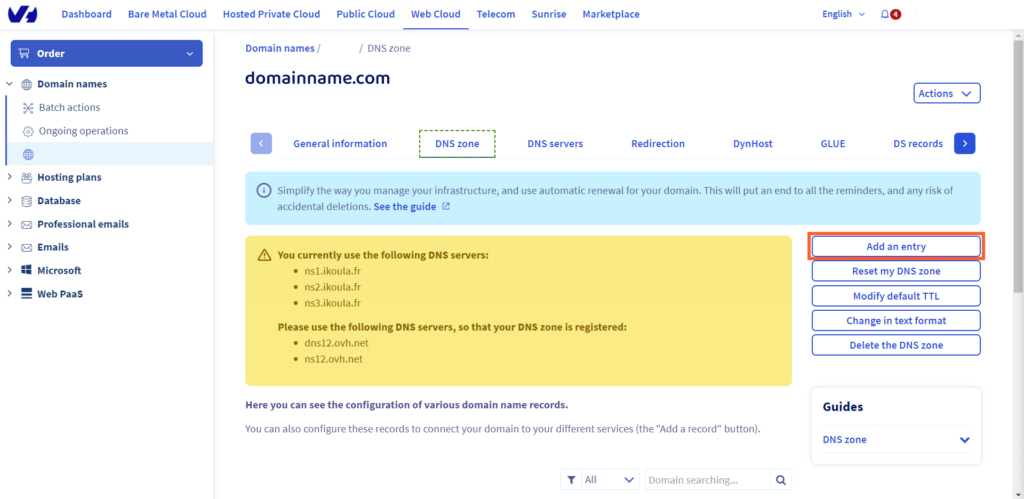
- Click on Add an Entry
- Click on TXT
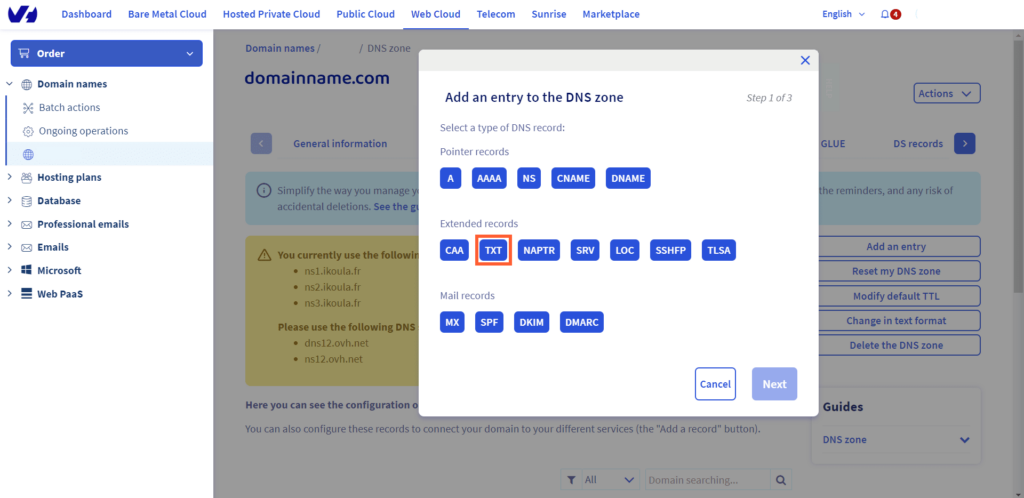
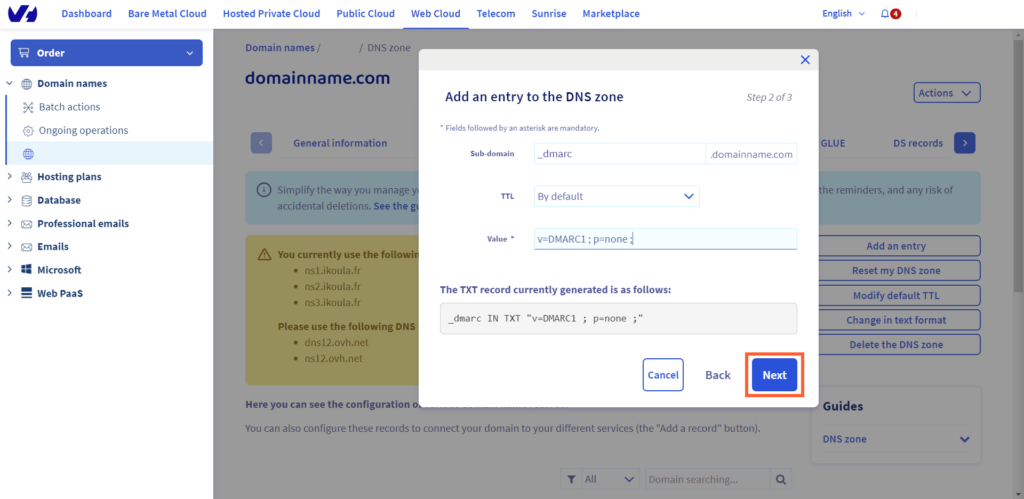
- Configure DMARC: enter the following information:
Sub-domain: Enter "_dmarc"
TTL: Leave this value as it is by default.
TXT Value: "v=DMARC1 ; p=none ;"
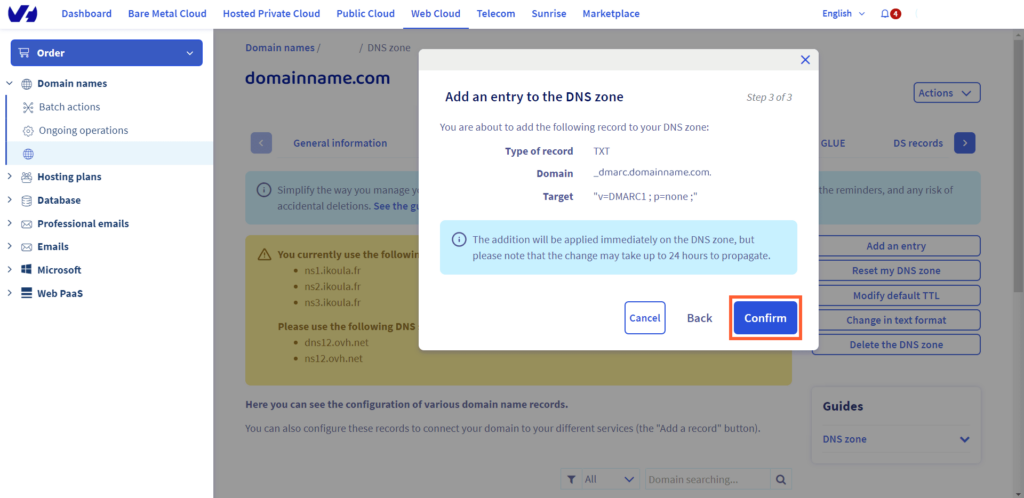
- Click on "Confirm"
- Search for a value that contains the word "spf". If "spf" exists: go to step 15. Otherwise go to step 11.

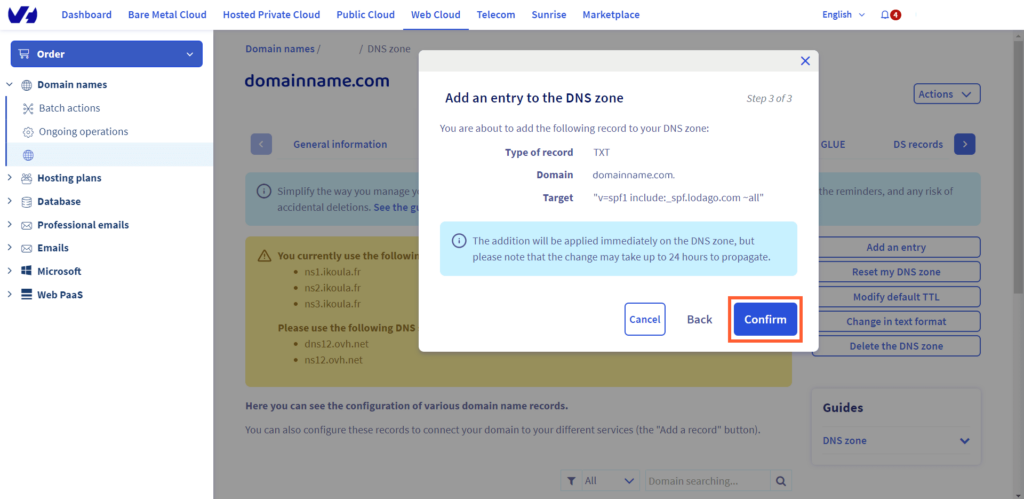
- Click on Add an Entry

- Click on TXT

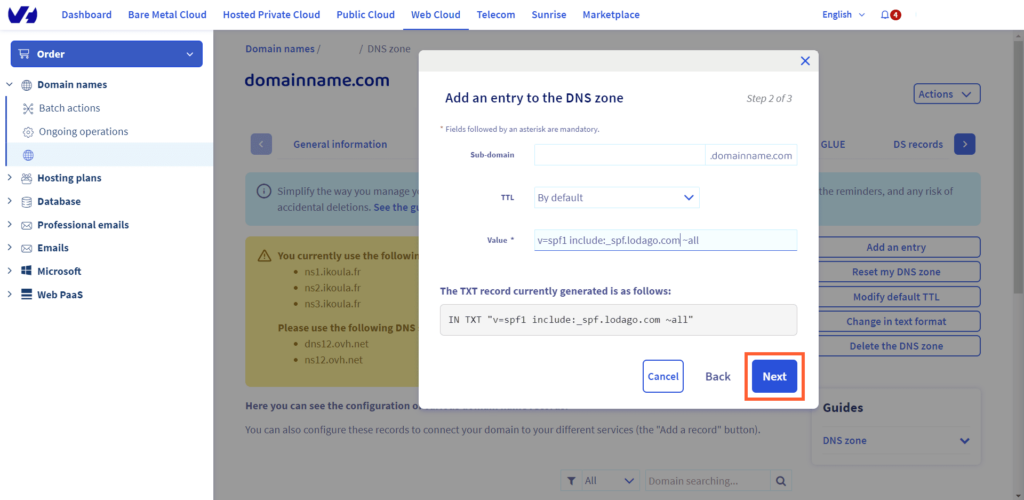
- Configure SPF: enter the following information:
Sub-domain: Leave this value blank.
TTL: Leave this value as it is by default.
TXT Value: "v=spf1 include:_spf.lodago.com ~all"
- Click on the Show More icon (circle with three dots) next to the entry
- Click on "Modify record"
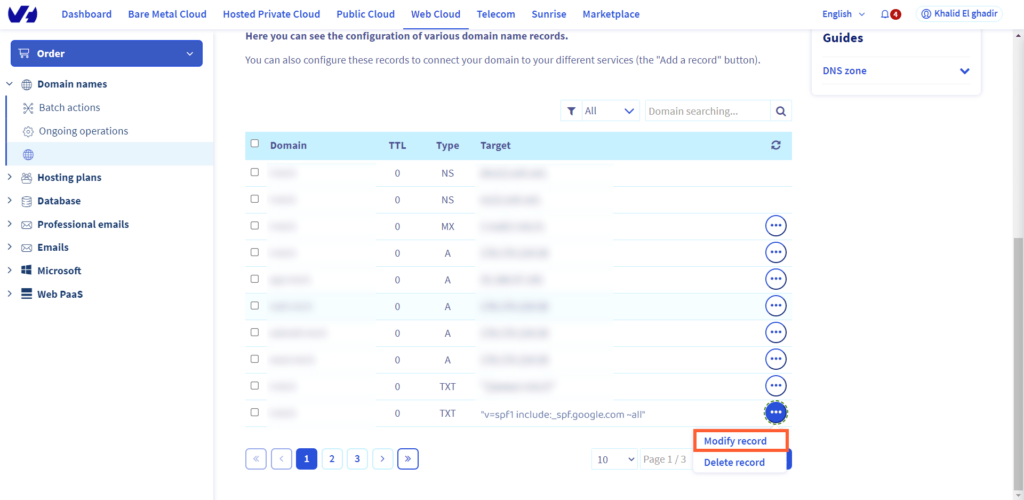
- Add " include:_spf.lodago.com" into the content of your SPF (make sure to separate the new content from the old one with a space)
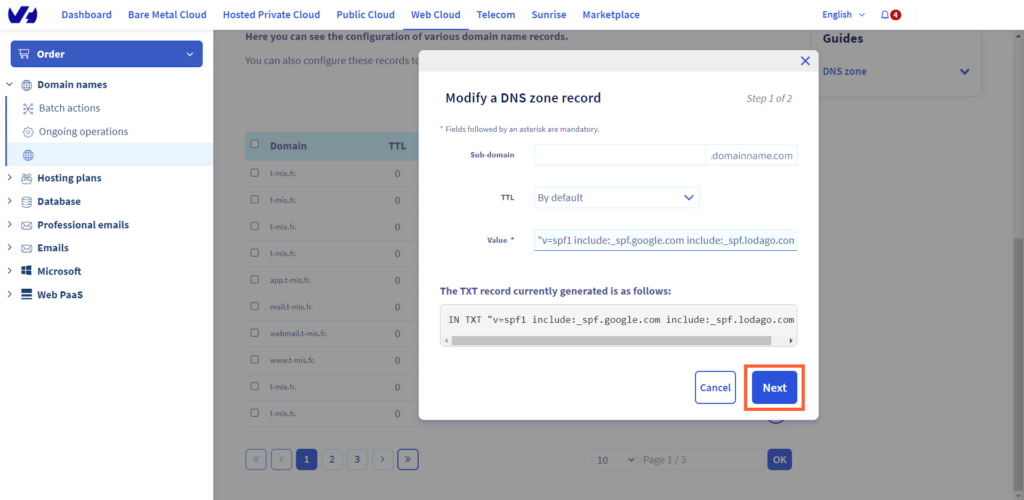
- Click on "Confirm"
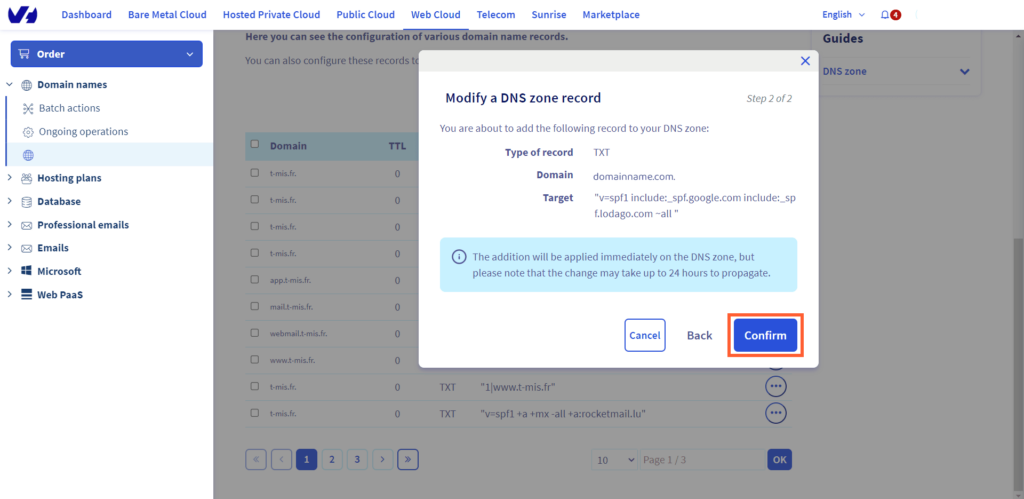
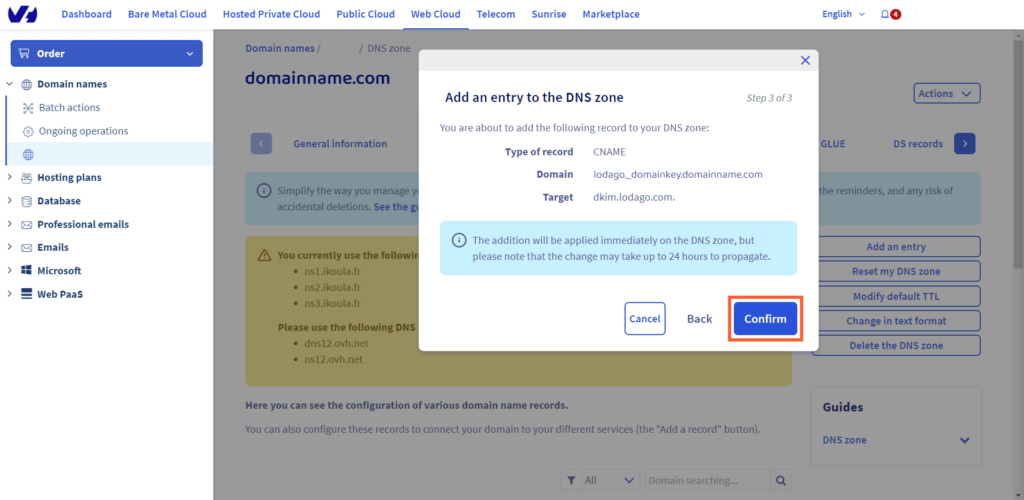
- Click on Add an Entry

- Click on CNAME
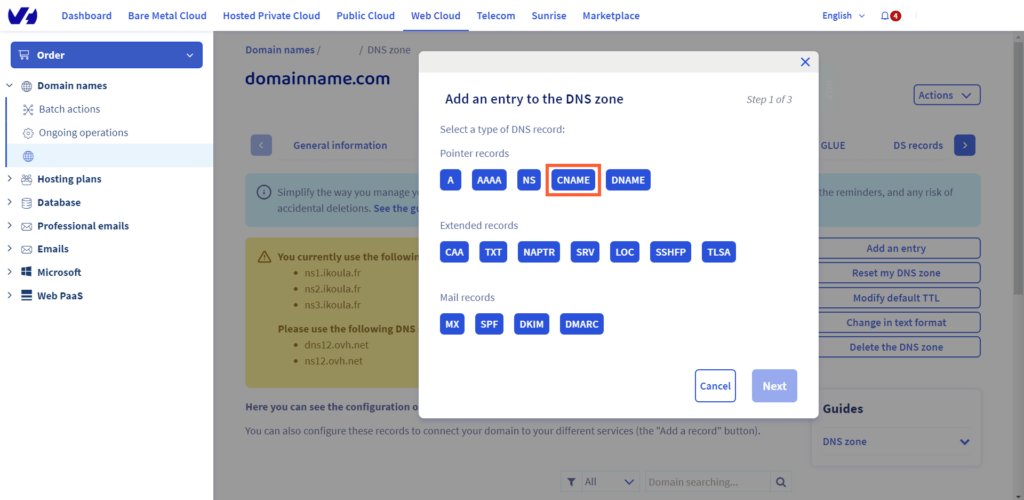
- Configure DKIM: enter the following information:
Sub-domain: Enter "lodago._domainkey"
TTL: Leave this value as it is by default.
Target: "dkim.lodago.com"
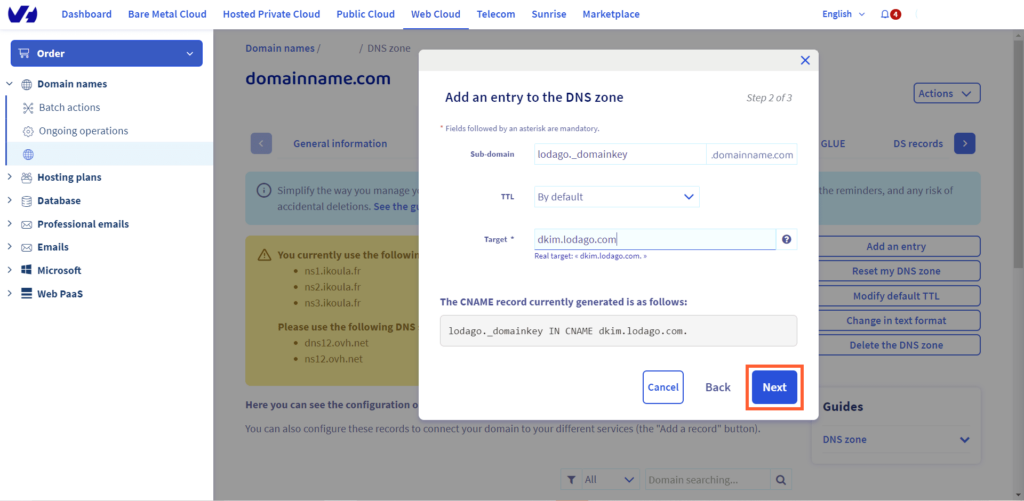
- Click on "Confirm".
