You can add customized forms to prequalify meetings, and capture any information you need to know about your prospect when the meeting is booked.
Understand the person who is booking a meeting with you by asking the right questions. You can easily create a form with unlimited questions.
The language of your form will automatically be translated into the language in which you write your email.
For example:
- If you write your email in French, the form will be displayed in French.
- If you write your email in English, the form will be displayed in English.
The language of your form will automatically be translated into the language of the browser in which it is displayed.
For example:
- If your prospect’s browser is in French, the form will be displayed in French.
- If your prospect’s browser is in English, the form will be displayed in English.
That is why you only have to create ONE form for all languages.
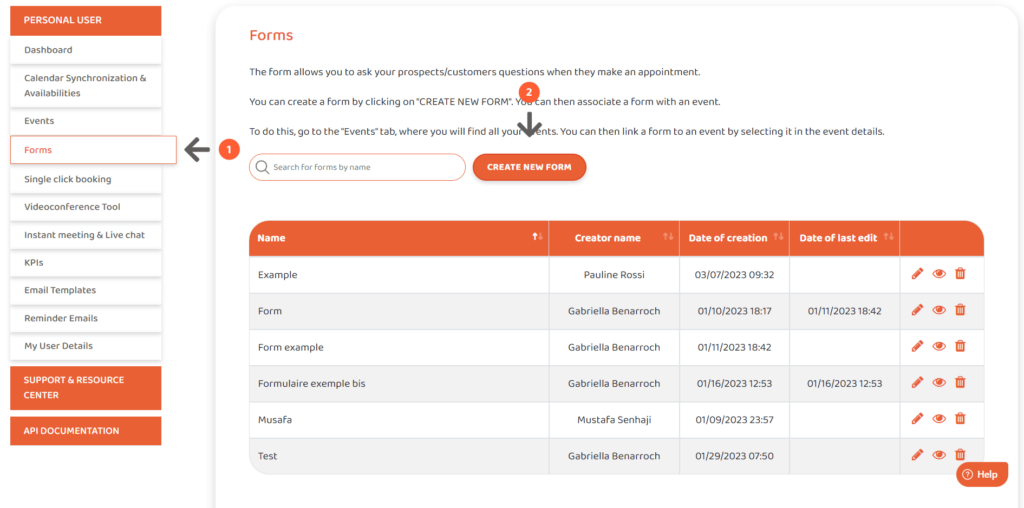
- Go to the “Forms” tab of your Lodago account.
- Click on “CREATE NEW FORM”
- Give the form a name
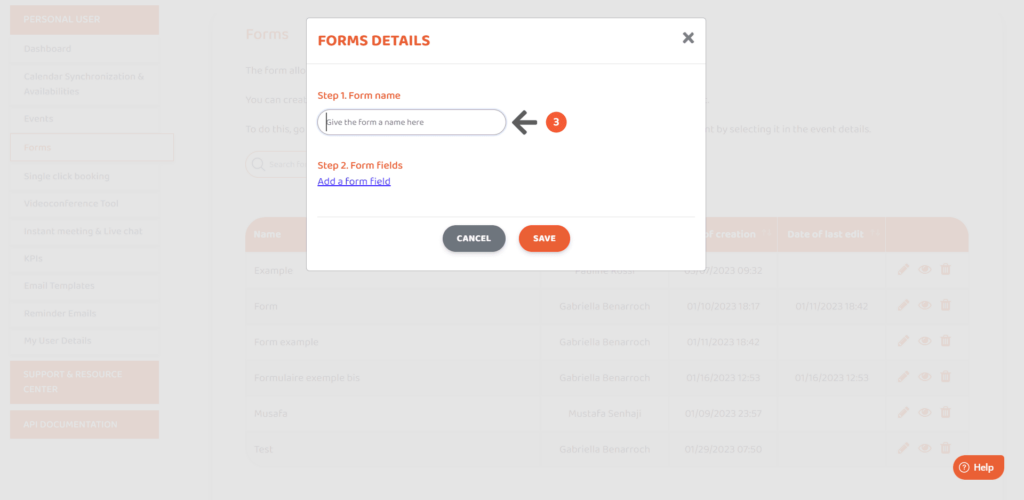
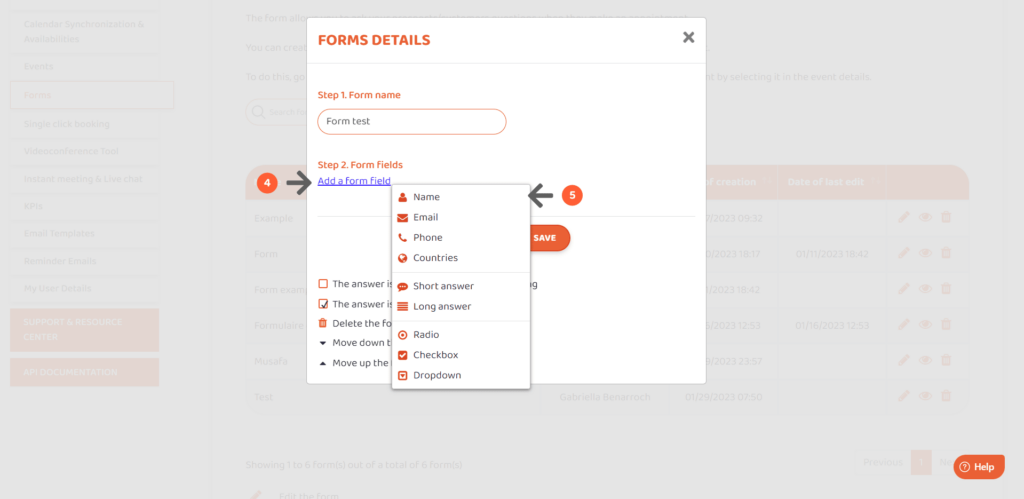
- Click on “Add a form field”
- Click on the form field you want to add
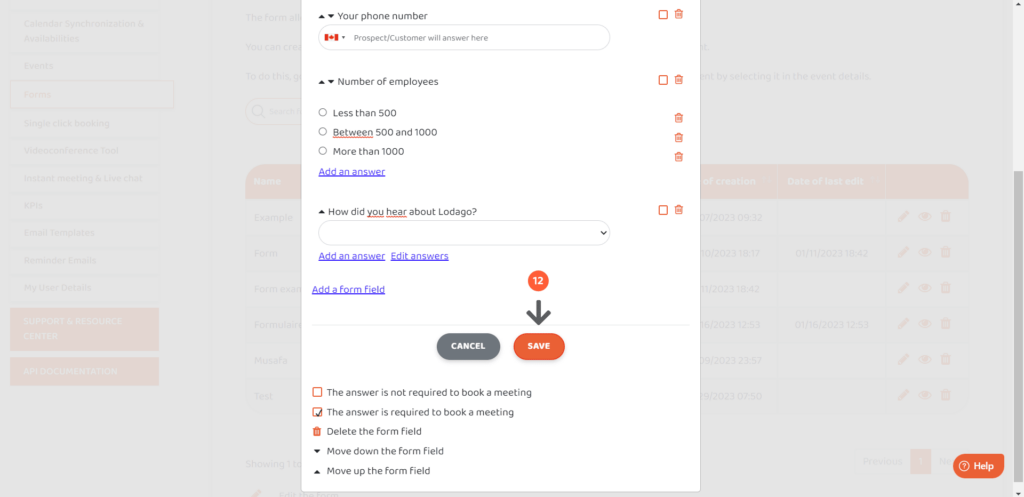
There are several different types of form fields: short answer, long answer, radio, checkbox, and dropdown.
There are also 4 template questions : Name, Email, Phone, and Countries.
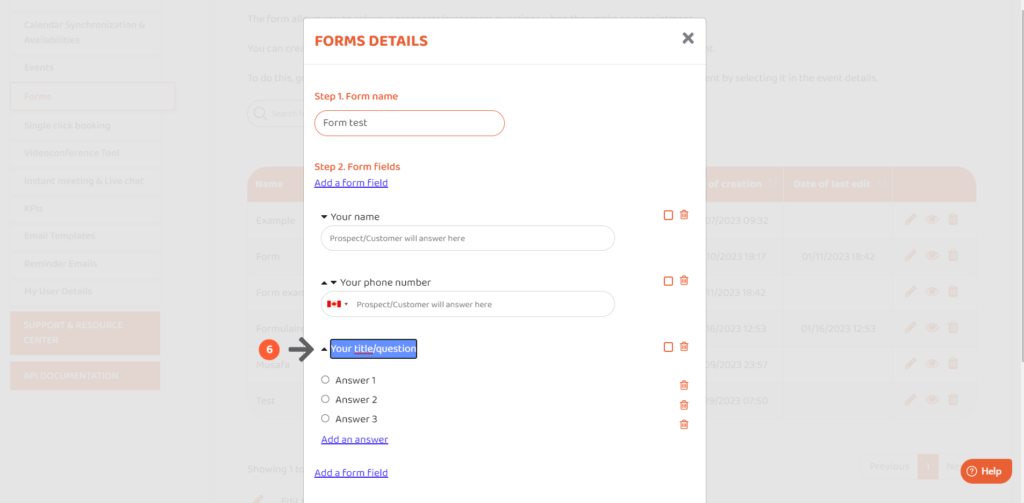
- Customize the name of your field by clicking on its current name
You can change the name of any field you add.
For example : click on “Your title/question” to write your own question.
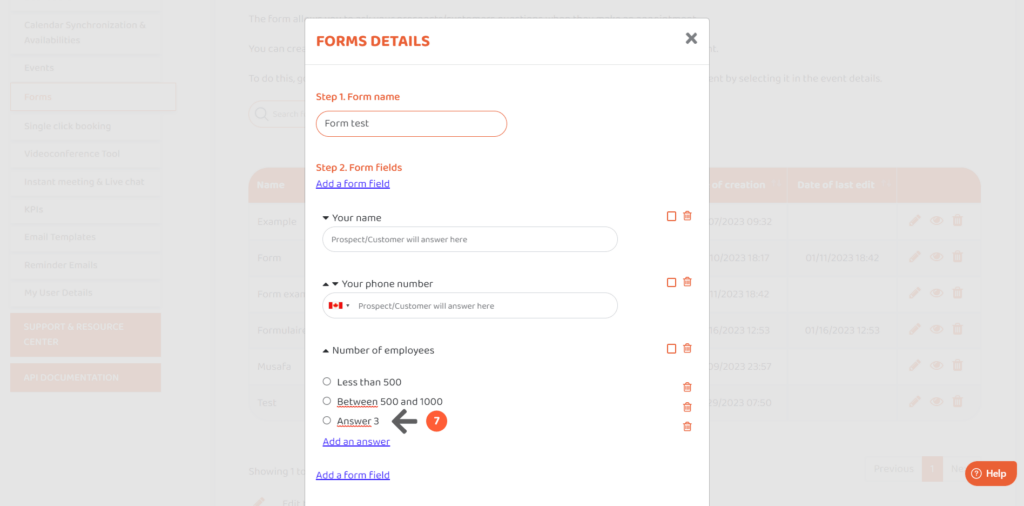
- Customize the answers to your questions : if you use a radio or a checkbox, click on the answer field to change its content.
For example, click on “Answer 3” to change the 3rd answer.
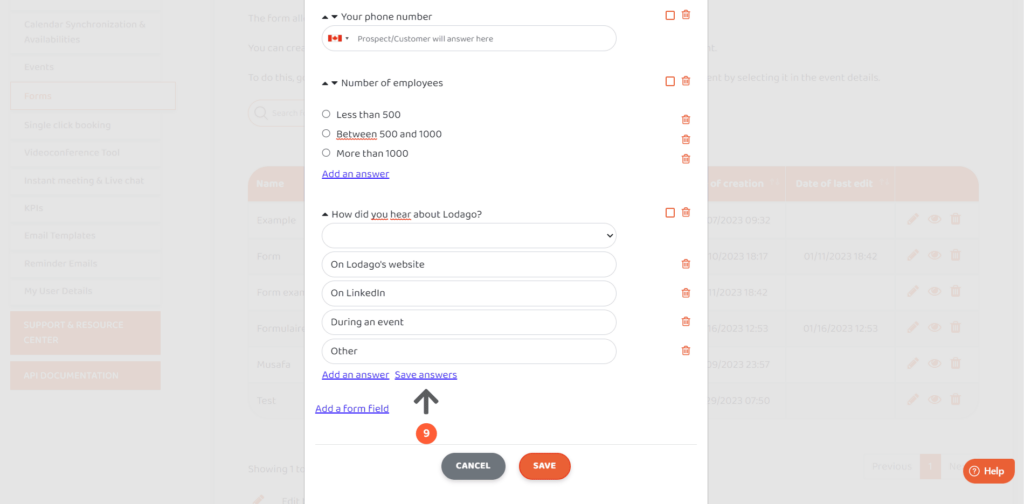
- If you use a dropdown, click on “Edit answers” or on “Add an answer”, and then on the answer you want to change the content.
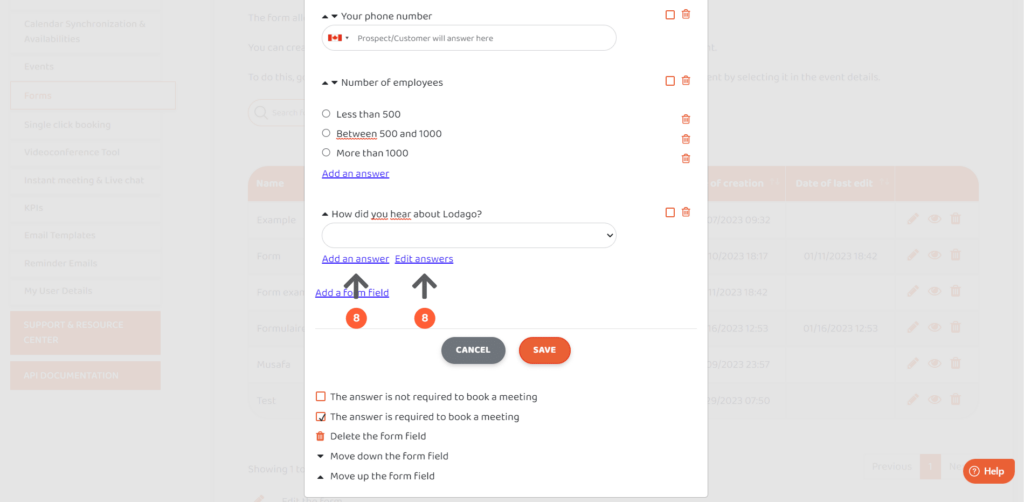
- Then, click on “Save answers”
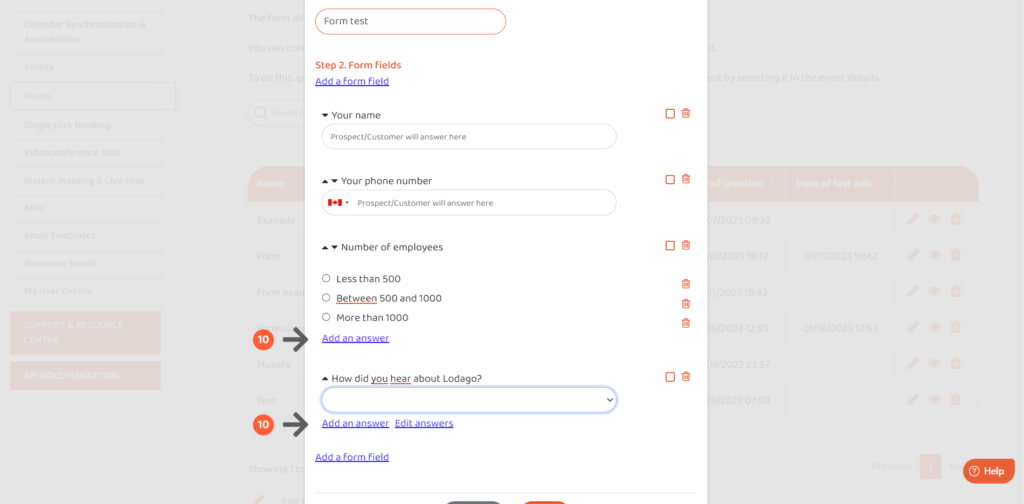
- For all of these fields, click on “Add an answer” to add a new answer.
When you add a field, 3 answers are automatically created. You can edit and delete them. If you want more than 3 answers, you only have to click on “Add an answer” and edit the new answer.
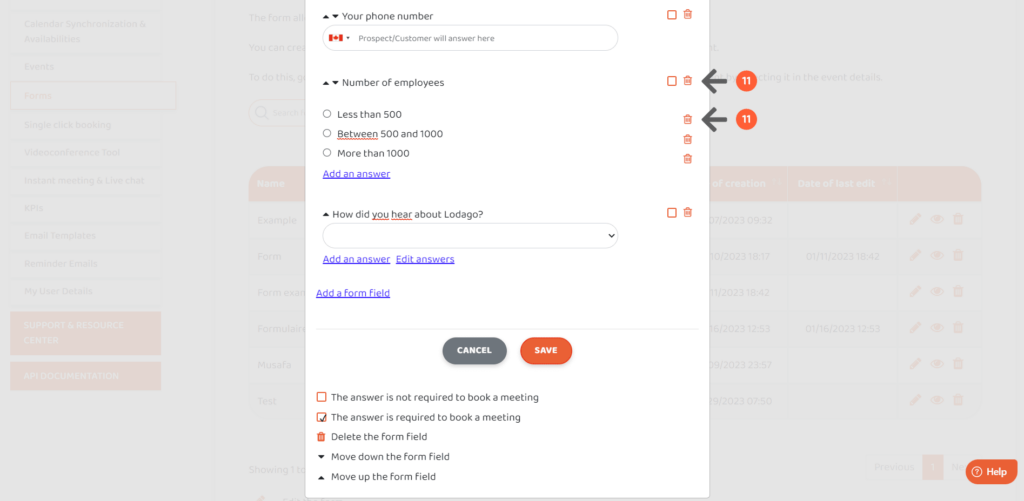
- If you want to delete a field or an answer, click on the delete button at the right of the item you want to remove.
- Click on “SAVE”
