How to set up your Google connector?
The connector setup is easy and takes a few minutes. But if you need help or have any questions, we remain fully available. At anytime, you can contact us by:
- Live chat (available at the bottom right of your screen)
- Contact form
- Booking a meeting with us
Not using Google? Click here to see the guide for Outlook connector.

How to set up your Google connector?
- Go to your Google Admin Console by clicking here: https://admin.google.com
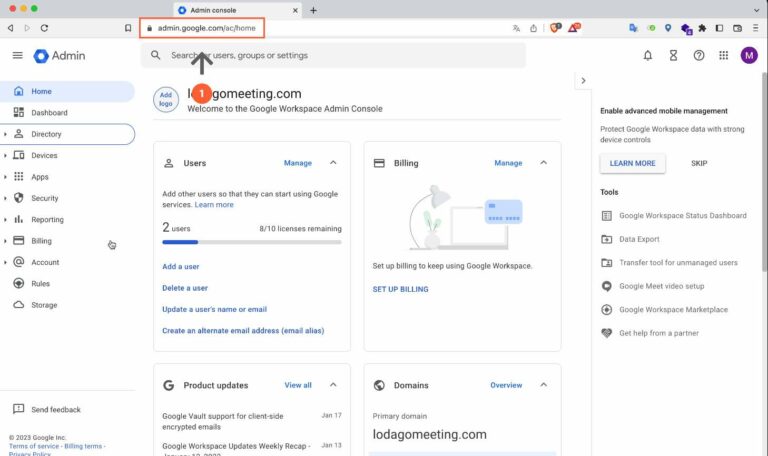
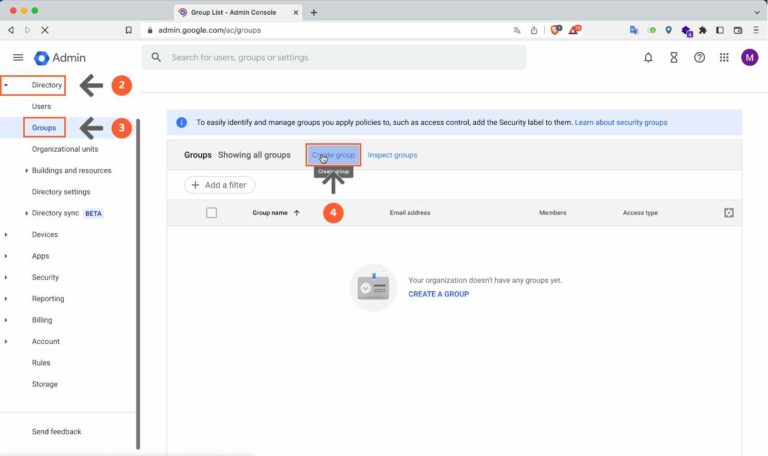
- Go to the "Directory" tab
- Click on "Groups"
- Click on "Create group"
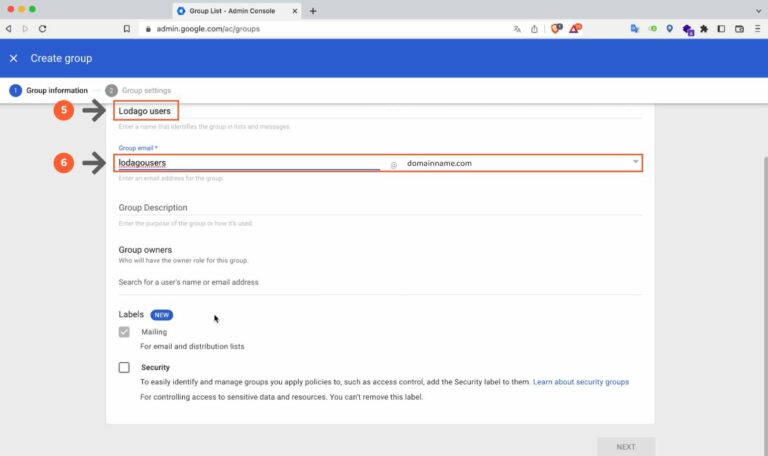
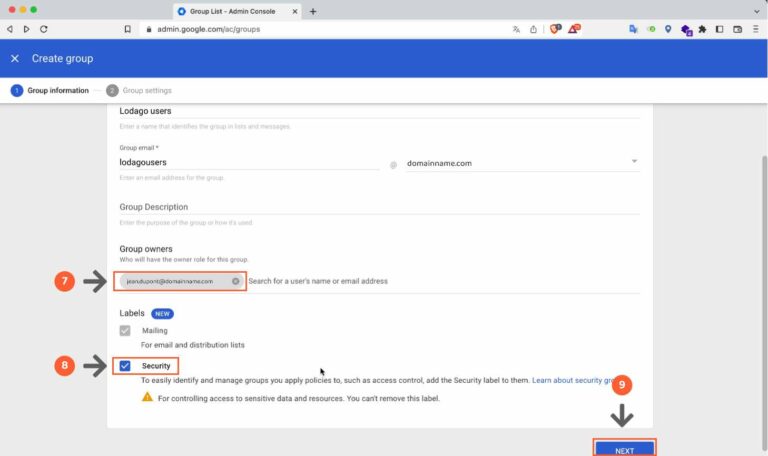
- Enter the group name "Lodago users"
- Create an email address for the group "lodagousers@ domainname.com"
Warning: Replace @domainname.com with your domain name.
For example :
- if your domain name is bestshop.com, the group address will be lodagousers@bestshop.com
- if your domain name is superagency.com, the group address will be lodagousers@superagency.com
- if your domain name is iamlucky.com, the group address would be lodagousers@iamlucky.com
This group email address will be used so that we can send emails to all Lodago users in your company. By sending an email to this group email address, all users in the group will automatically receive this mail.
- Select the desired "Group owner"
The group owner will manage the group. They will be able to add/remove members, change the group settings, rename the group, update the group description, and more.
We recommend that the group owner is :
- the Lodago admin
- admin or the person in charge of IT in your company.
- Select "Security"
- Click on "Next"
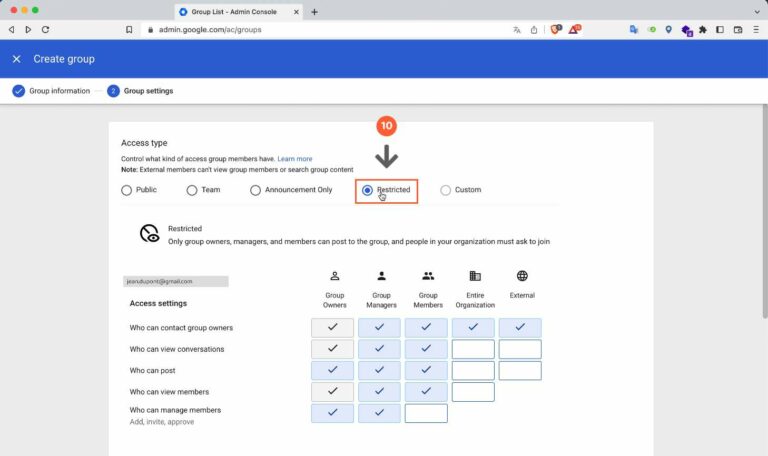
- Select "Restricted"
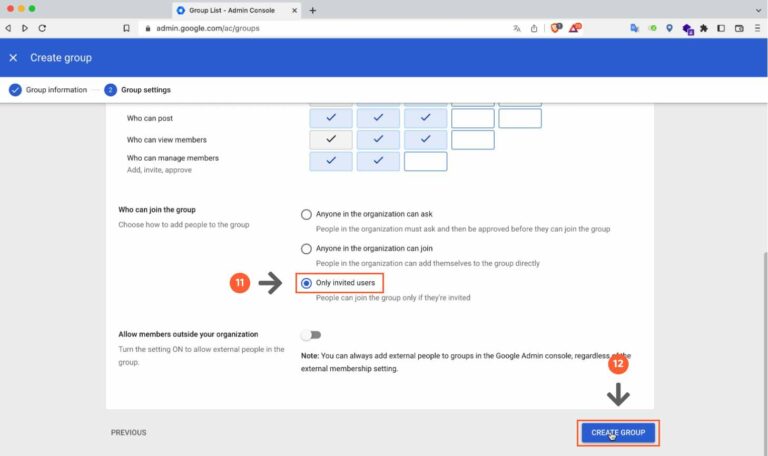
- Select “Only invited users”
- Click on “CREATE GROUP”
- Click on “DONE”
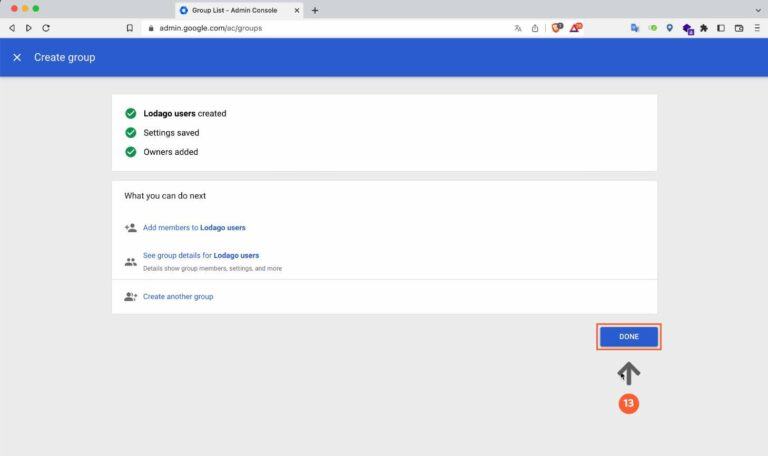
- Click on the “Add members” button
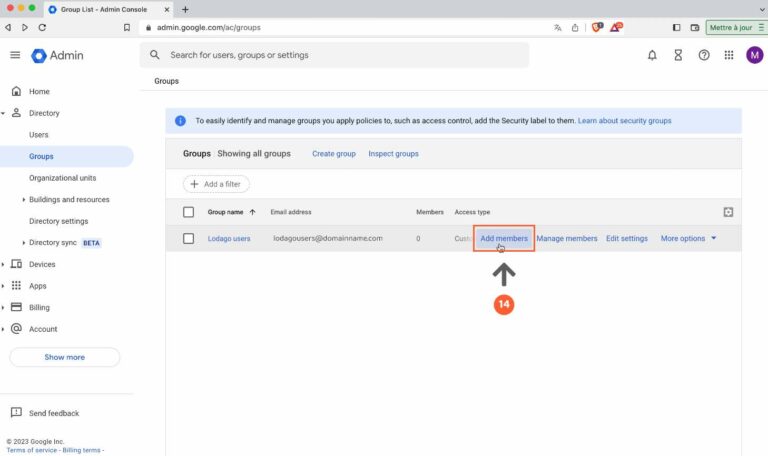
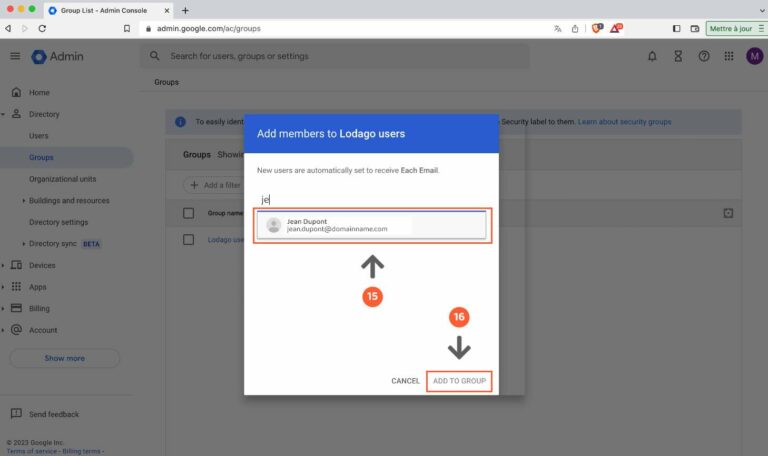
- Select the members you wish to add to the group by searching for them in the search bar.
- Click on “ADD TO GROUP”
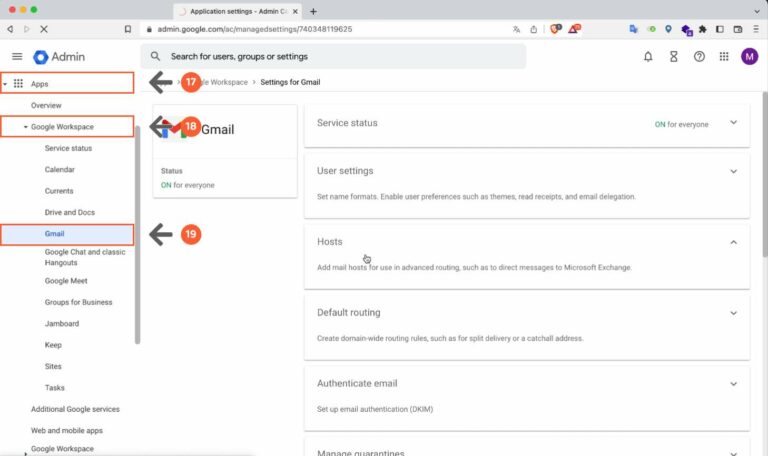
- Go to the "Apps" tab
- Click on "Google Workspace”
- Click on "Gmail"
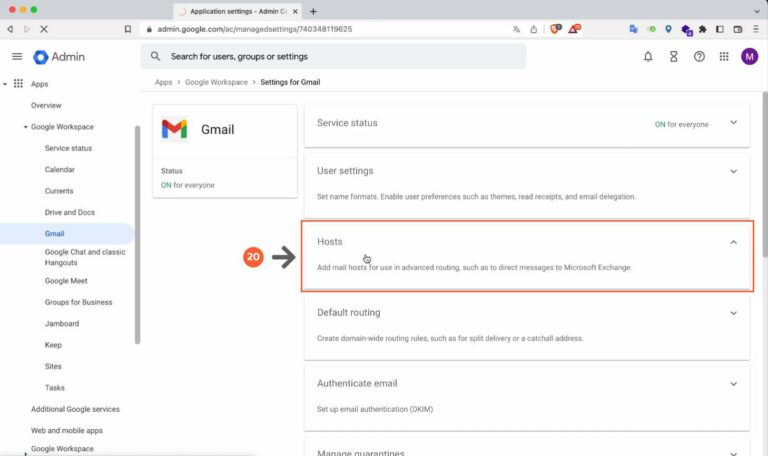
- Click on “Host”
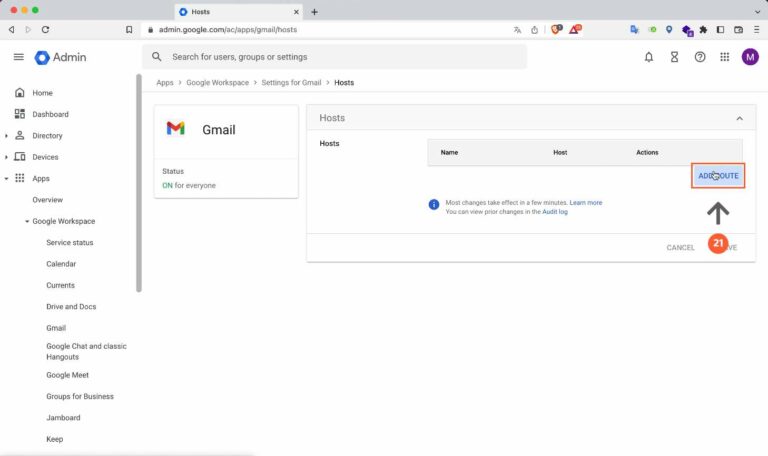
- Click on "Add route", and an "Add mail route" window appears.
- Add the name "Lodago connector" to your connector.
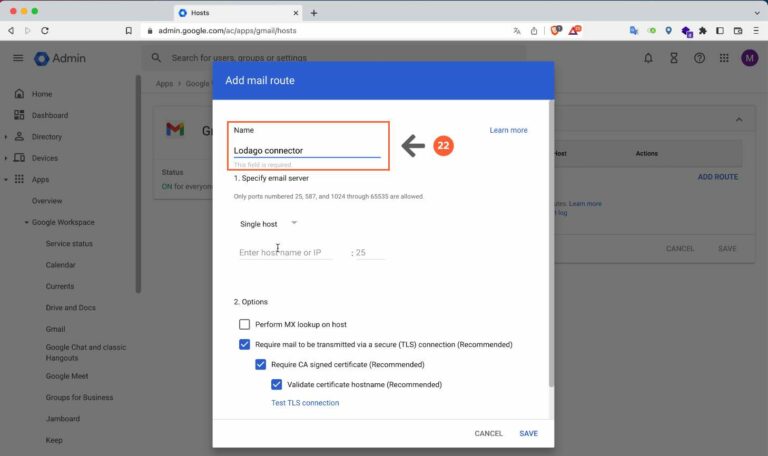
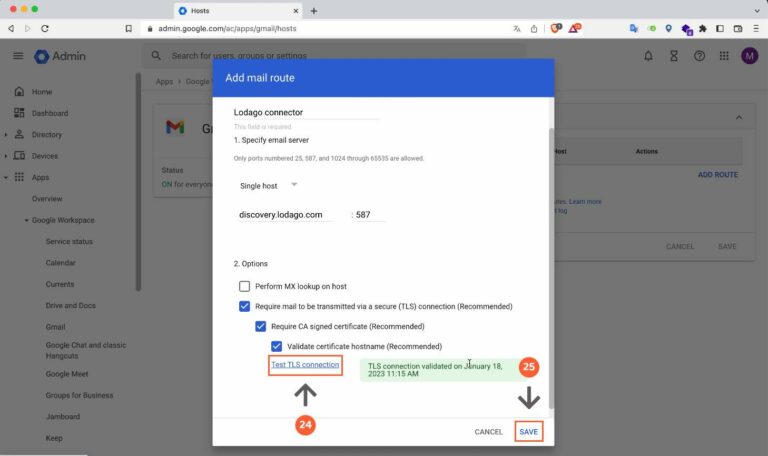
- Under "Single host", in the "Enter host name or IP" bar enter the server name we provided you by email, then "587".
- Click on "Test TLS connection" to test the connection
- Click on "Save".
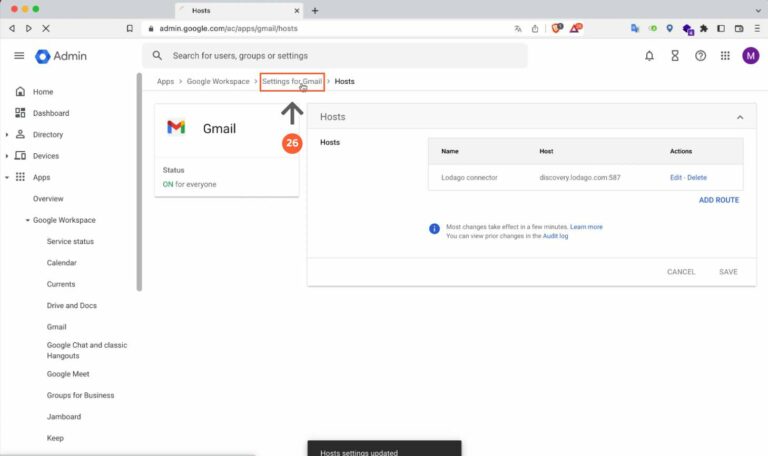
- Then click on 'Settings for Gmail' in the tabs at the top of your screen.
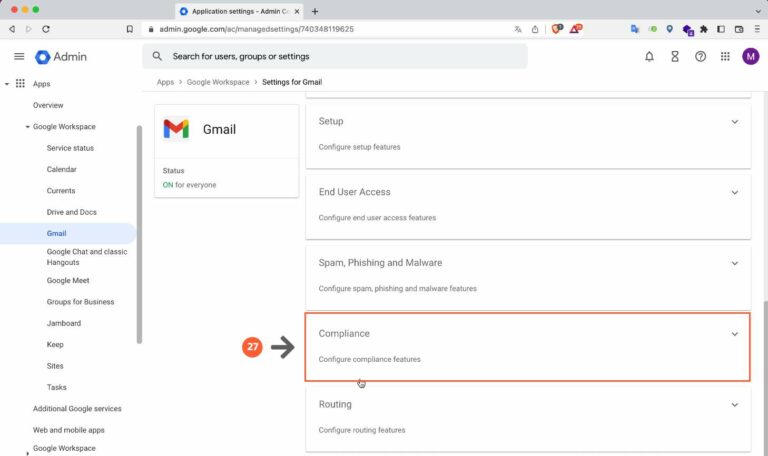
- Click on "Compliance" at the bottom of the page
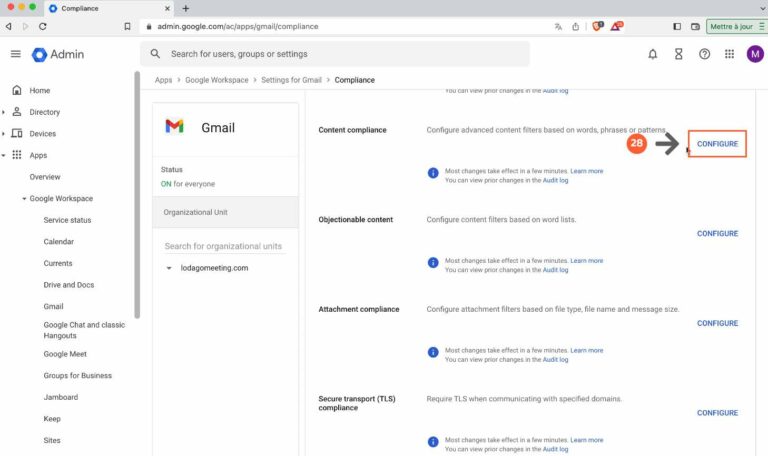
- Then click on the "Configure" button to the right of "Content compliance". A popup window called "Add setting" will open.
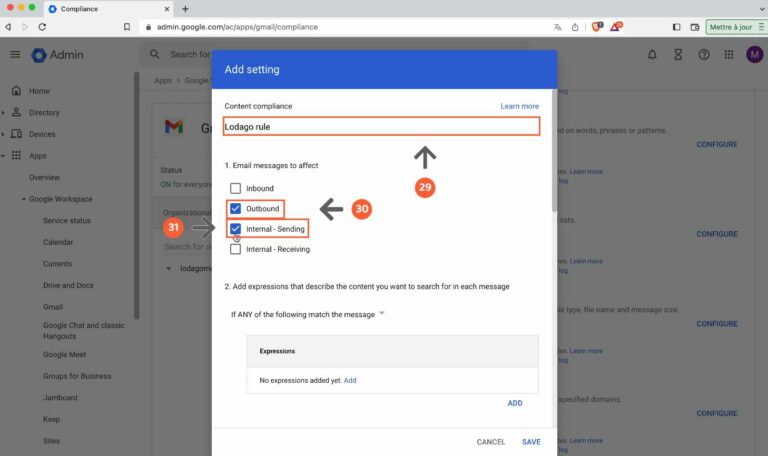
- Enter the name "Lodago rule"
- Select “Outbound”
- Select “Internal sending”
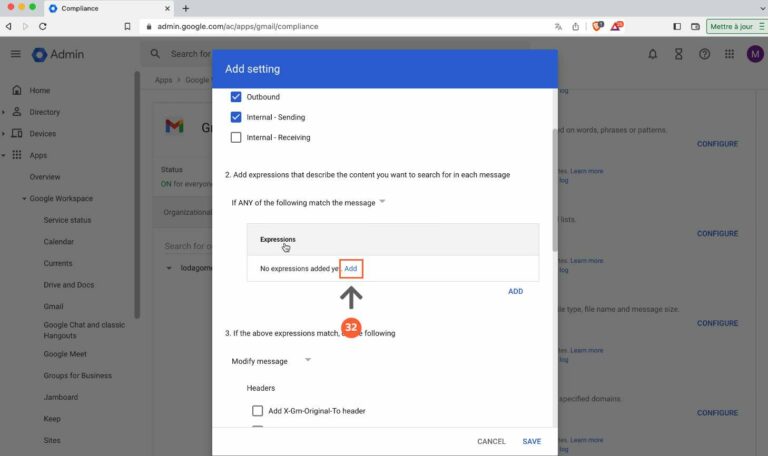
- Click on "Add"
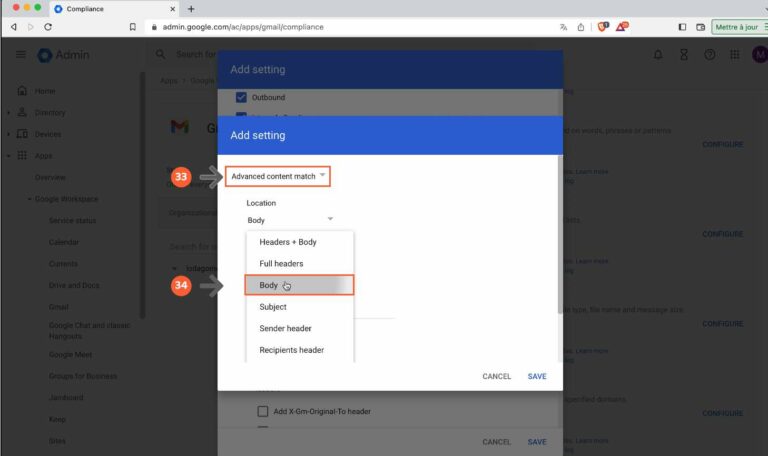
- Select "Advanced content match", from the first drop-down menu
- Select "Body", from the second drop-down menu
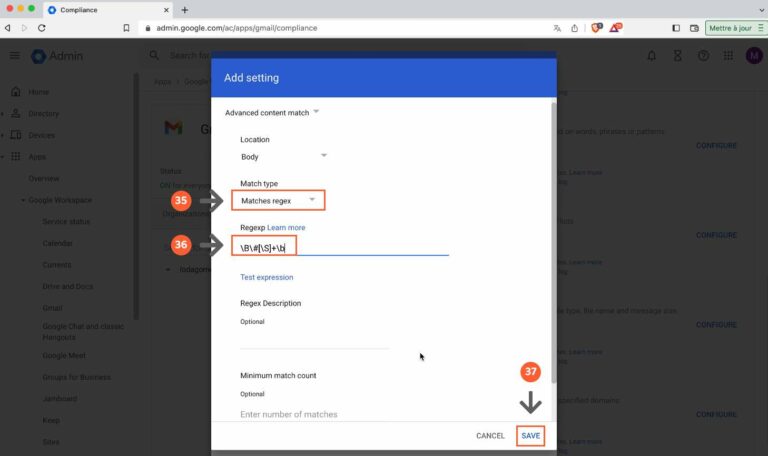
- Select "Matches regex", from the third drop-down menu
- Enter \B\#[\S]+\b in the input bar
- Click on "Save"
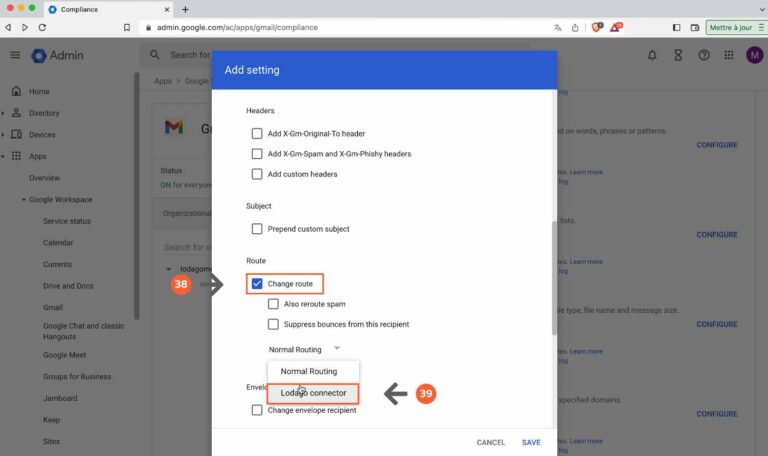
- In the "Route" section, select "Change route".
- Choose from the drop-down menu the "Lodago connector" that you created in step 22
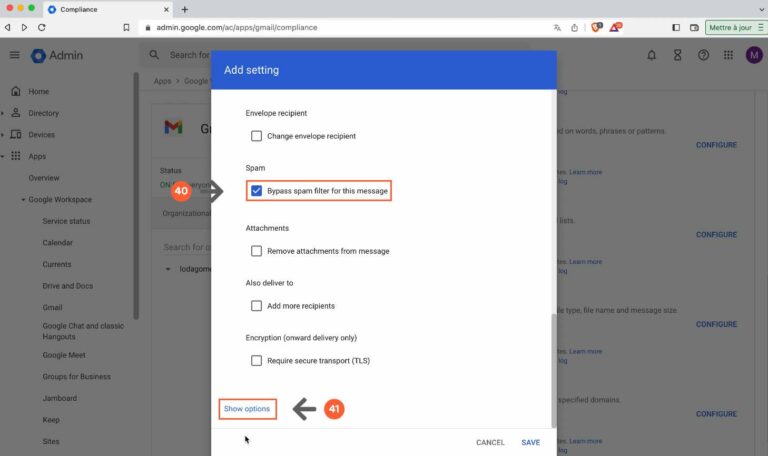
- Select “Bypass spam filter for this message”
- Click on "Show options"
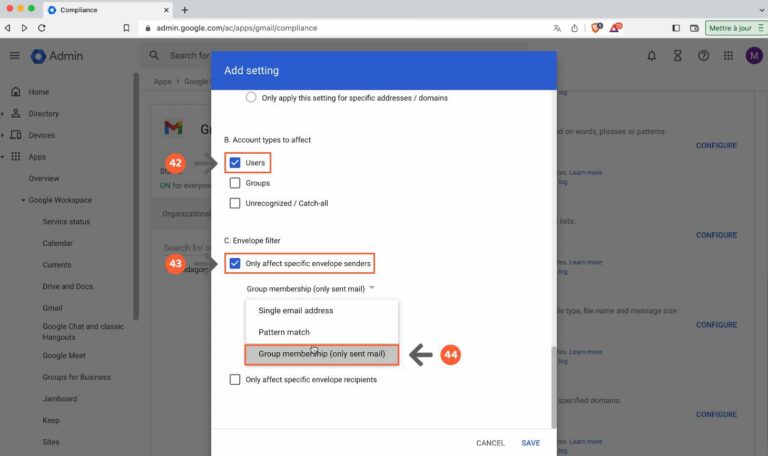
- Check that the "Users" option is selected
- Select "Only affect specific envelope sender"
- Select "Group membership (only sent mail)" from the drop-down menu.
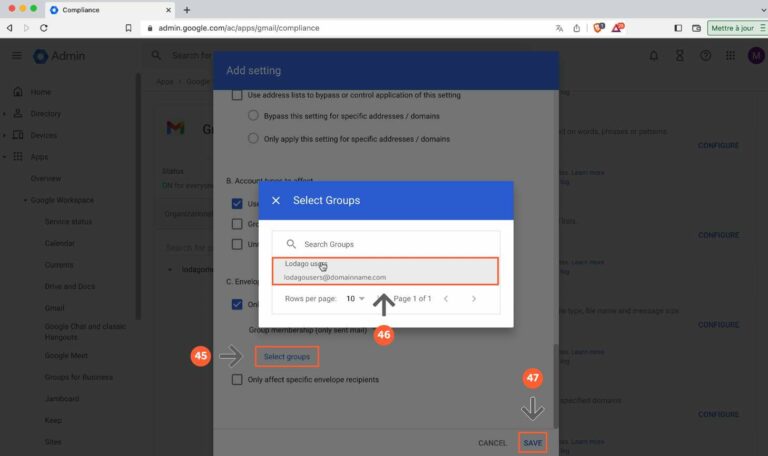
- Click on "Select groups".
- Select the "Lodago users" group created in step 12
- Click on "Save"
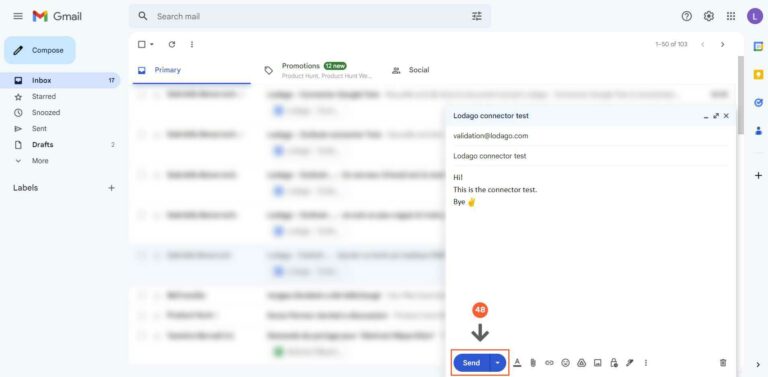
- Finally, send an email to validation@lodago.com, from an email address in your "Lodago users" group, with the subject "Lodago connector test" to test your connection!
Content of the email:
Hi!
This is the connector test.
Bye ✌
